PCBMilling
Step-by step PCB milling tutorial.
Board preparation
Required software
Make sure you have following tools installed:
- Kicad or Eagle
- pcb2gcode - conversion of Gerber files to G-code
- pcb2gcodeGUI - GUI for pcb2gcode
- Camotics - G-code simulator for verification (optional)
- hacked_cnc - control, visualization and G-code leveling (optional, installed on linuxcnc host)
On Fedora pcb2gcode(GUI) can be installed from packages:
dnf install pcb2gcode pcb2gcodeGUI
Kicad export
Note: it's better to export gerbers and gcode to separate folder, sometimes you need to re-export stuff to correct for errors and you don't want to mix files between revisions.
To export Gerber files from Kicad
- choose File -> Plot
- set Plot format to Gerber (default)
- set Exclude PCB edge from other layer
- select layers to export - depending on your design this is either F.Cu or B.Cu and Edge.Cuts layers
- click Plot on the bottom of the window
- click Generate Drill file next to Plot
- set Drill Units to Millimeters
- set Drill Origin to Absolute
- click Drill File button on the right side of the window
G-Code conversion
To convert Gerbers to G-code use either pcb2gcode from command line or pcb2gcodeGUI.
Make sure to set correct drill side, if your design is on F.Cu you want to drill from the front side (--dril-side=front) and vice versa.
If you don't want to switch tools for drilling choose One drill option (--onedrill=true) which merges all drill operations to one file (bit size).
Simulation / preview
You can verify if everything is correct by importing all files to Camotics G-code simulator.
Ideally your board should start at positive X, Y coordinates with lower left corner near X0/Y0.
File upload
Upload folder to LinuxCNC machine:
scp -r project/ base@linuxcnc.base48.cz:<your_nick>/
Machining
Machine preparation
- Start linuxcnc machine (reachable at linuxcnc.base48.cz)
- Start machine controller
- Start cooling pump
- Pick a V-shaped tool from the box and install it
Clamping
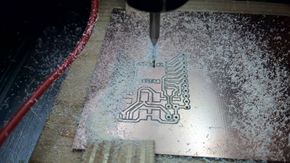
Make sure to clamp PCB blank as good as possible as it's critical for the outcome of the leveling and milling.
- Clamp PCB blank on top of piece of wood with at least 4 clamps
- Make sure RED wire is touching the PCB, it has to be put under one of the clamps so it won't come loose
LinuxCNC
- Start LinuxCNC by running base_mill shortcut on the desktop
- Enable machine control by disabling emergency stop (F1) and enabling power (F2)
- Position the machine with arrow keys to a starting point (bottom left corner of your future pcb)
- Home each axis of the machine, don't forget to home A axis as well
- Load F.Cu or B.Cu G-code file
- Try moving machine around displayed job to make sure it can actually reach all sides of the job without collisions
- Switch to MDI tab (F5) (all the required commands in the following section should be present in the history)
- To get to the starting point run G0 X0 Y0
- To home Z-axis use G38.2 Z-100 F30
- Go back to manual tab and re-home Z axis
Leveling
- Switch to workspace 3, open terminal and find a directory with your jobs G-code files
- Run pcb2gcode_postproc.py in that folder
- Switch to workspace 4, find terminals with hacked_cnc directories
- In the first terminal (~/hacked_cnc) run
./hcc server --linuxcnc
- In the second terminal (~/hacked_cnc/hc/ui/probe/) run
./probe.py
- Open postprocessed file in probe GUI e.g. proj_front_post.ngc
- Check if there are enough probe points for the size of your board and andjust if not
- Probing first goes to -margin which means it will start at X-3 (default margin of 3mm) if your board stars at X0, make sure there's enough free space for this move if you're tight on the space of the blank PCB - the margin has to be at least 1mm for leveling to work
- Run Run Probe
- When probing is done run Process
- File is automatically saved with lvl_ prefix when processing is done
- Now switch back to LinuxCNC window and load suffixed file
Milling
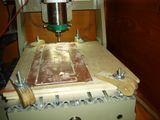
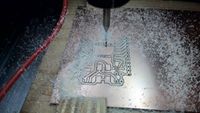
- Start job with blue arrow button
- Hope for the best, abort with F1 if stuff goes wrong
Adjusting milling depth
If your board is not milled deep enough
- Stop job with F1
- Disable safety stop by pressing F1 again
- In MDI tab
- Move machine to Z1 with G0 Z1
- Set machine position to e.g. Z1.1 to add 0.1mm with G92 Z1.1
Drilling
- Load drill file (e.g. drill_post.ngc)
- Install correct drill bit
- To re-establish Z height again
- Go to Manual tab (F3) and position a head outside of the milled PCB near clamp with probing wire attached so probing is possible, then few millimeters on top of the spot but don't try to make contact
- Go to MDI tab (F5) and issue probing command G38.2 Z-100 F30
- Go back to manual tab and re-home Z axis
- Start drilling job
Outline
- Load outline file (e.g. outline_post.ngc)
- Load 3.175mm endmill
- Go to manual tab a re-establish Z height again by positioning tool slightly over the board
- re-home Z axis
- Start job
Post-processing
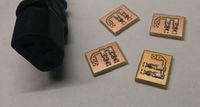
- Clean your board with sandpaper and alcohol
- Use flux spray
- Leave a board on a warm place for a while
- Clean-up and power down the machine meanwhile, remove tool from tool holder
- Take pictures
- Solder components
- Profit
Gallery
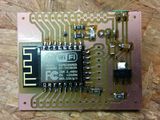
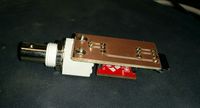
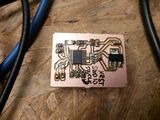
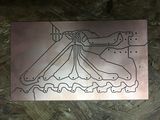
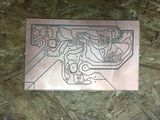
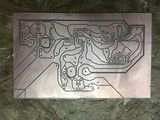
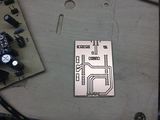
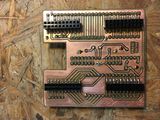
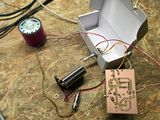
Feel free to upload pictures of your finished PCBs and add link(s) to following gallery:
Oldstuff mov to git
pcb2gcode
git clone https://github.com/pcb2gcode/pcb2gcode
sample make_gcode script
#!/bin/bash

pcb2gcode \
--front=front-gerber-F.Cu.gtl \
--back=back-gerber-B.Cu.gbl \
--drill=drill.drl \
--outline=Edge.Cuts.gm1 \
--output-dir=gcode \
--dpi=1000 \
--metric=true \
--metricoutput=true \
--mirror-absolute=false \
--optimise=true \
--tile-x=1 --tile-y=1 \
--vectorial=false \
--zchange=20.0000 \
--zero-start=true \
--zsafe=2.0000 \
--extra-passes=3 \
--mill-feed=450 \
--mill-speed=24000 \
--offset=0.1500 \
--zwork=-0.0500 \
--drill-feed=250 \
--drill-side=back \
--drill-speed=12000 \
--milldrill=false \
--nog81=false \
--onedrill=false \
--zdrill=-3.0000 \
--bridges=0.8000 \
--bridgesnum=4 \
--cut-feed=200 \
--cut-infeed=1.0000 \
--cut-side=back \
--cut-speed=24000 \
--cutter-diameter=3.1750 \
--fill-outline=true \
--outline-width=0.2000 \
--zbridges=-0.0500 \
--zcut=-1.7000
